Email: office@ITweb.ro Telefon: 0768.46.16.16

Step 1: Access your MySQL database
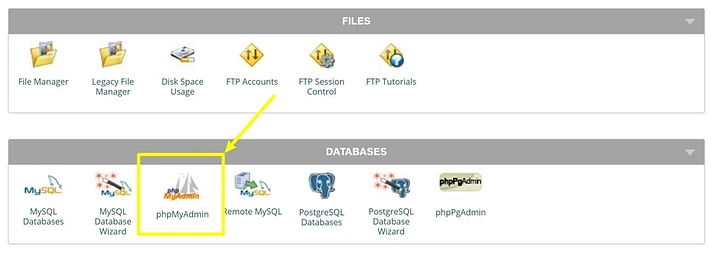
Before you add new user, you’ll need to access phpMyAdmin – it’s not a plugin, but rather a free software tool written in PHP – and edit your database. You can usually do so via a link in your WordPress hosting account dashboard.
The exact name varies depending on the host, but look for options such as:
- phpMyAdmin
- Database Manager
Here’s what it looks like in cPanel:
Step 2: Go to the wp_users table
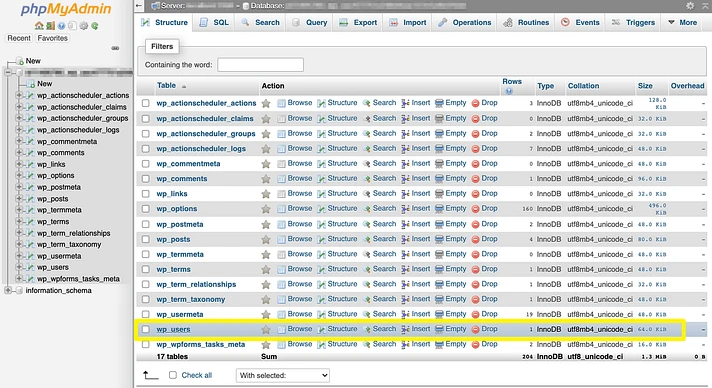
Now, select your WordPress site’s database from the list of databases on the left. Then, click on the wp_users table.
Note – some hosts change the prefix of the wp_users table for security. For example, you might see it as wpud_users. Just open the table that says [something]_users.
Step 3: Insert a new WordPress admin user in the users table
In the wp_users table, click on the Insert tab.
On the next screen, you’ll see a form:
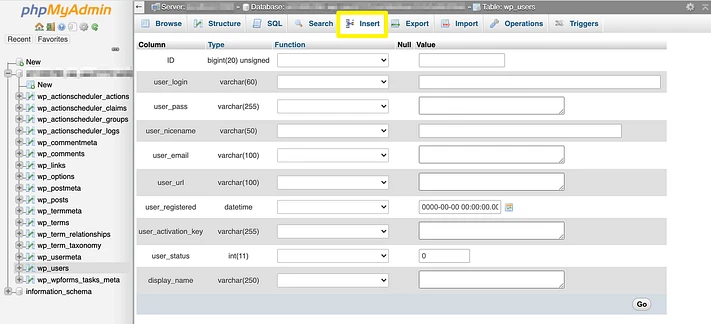
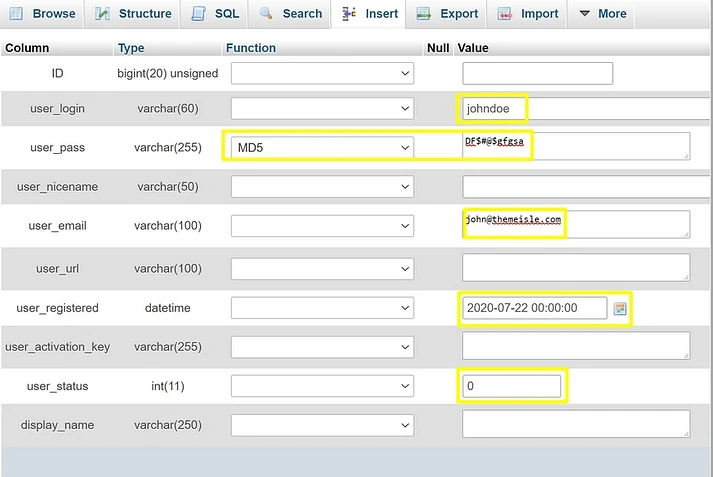
Fill in the following details:
user_login: Insert the username you want to use for your new admin user.user_pass: Add a password for the account and select MD5 in the Function drop-down.user_email: Add the email address you want to use.user_registered: Select the date and time for when this user should be registered.user_status: Set this value to zero.
Don’t worry about the other fields; leave them empty for now. Once you’ve filled out the fields, scroll to the bottom and click Go:
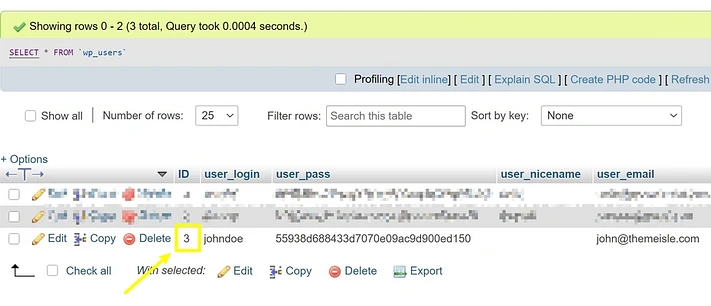
After clicking Go, you should see a success screen confirming the activation of the above sequence. If you go back to the wp_users table, you should see your new user. Pay attention to the value in the ID column, as you’ll need this in the next step:
Step 4: Insert user meta values
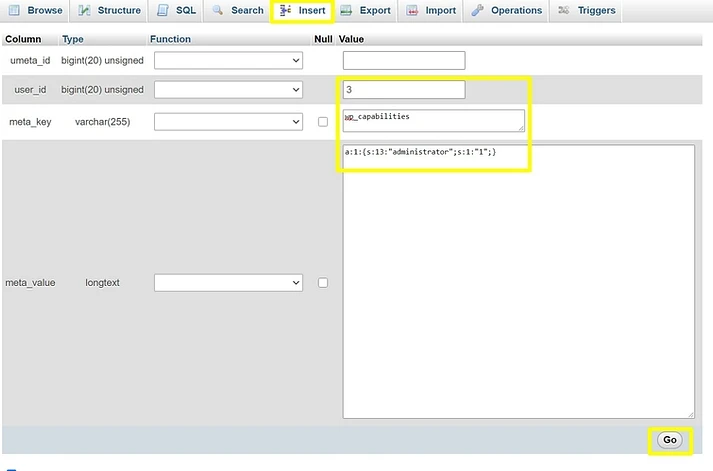
To finish things out, go to the wp_usermeta table and click on Insert. Again, the name might be slightly different – just look for the table that says [something]_usermeta.
Then, fill in the following values (again, leave the other fields empty):
user_id: Fill in theIDof the user you created in the previous step.meta_key: Enterwp_capabilitiesmeta_value: Fill in the field witha:1:{s:13:"administrator";s:1:"1";}